Pages

Sunday, November 23, 2014

Lime and Blue Quilt

This Christmas quilt is done and I love it. 

I didn't use a pattern, but I recently quilted one similar for my sister in law and I made this on in a similar way. My little granddaughter requested blue, lime green and gray for her quilt.  I think this pretty well covers all the bases.


  I love these little blocks with ruffles:


I quilted it with Dream Puff Batting and tried to keep the quilting open and not too dense so it would be fluffy and warm.


Here's the back in true color.
I just love pieced backs. 
 ....and I had just enough stripe left over for the binding.  


Saturday, November 22, 2014

Leaders and Enders

I have pieced 2 tops and backings for 2 twin quilts in the past couple of weeks.  During that time, I was also able to sneak in these blocks by doing Bonnie Hunter's leaders and enders method of making every minute and stitch count.  You can find her over at Quiltville.

ARE YOU KIDDING ME!  I am a believer! 

The above blocks were sewn together by using them as leaders or enders as I pieced these 2 quilt tops.....


I already have enough to make 10 nine-patch blocks for a charity quilt....and it only took me a few seconds as i was piecing these quilt tops.


I had about 4 charm packs from a previous life that I knew I was never going to use. As I pieced the quilt tops and came to the end of my chain piecing or just sewing a border, I grabbed a couple random charms and stitched them up, leaving them under the presser foot until I was ready to sew another row on my quilt.

When I snipped them off, I tossed them in a basket under the table.  I was amazed how fast it piled up.  
Later, I pressed and re-stacked the charms sewn together so I could start adding the 3rd charm.


I have used scraps for leaders and enders for years.

Just think of all the missed opportunities here that could have been pieced! 
I have literally tossed dozens and dozens of these scraps over the past 5-6 years.


As I pieced the quilt tops when I came to the end of my chain piecing or just sewing a border, I grabbed a couple random charms and stitched them up, leaving them under the presser foot until I was ready to sew another row on my quilt.

The best part of leaders and enders is that you never have to lift your presser foot, you sew on and off the leader and it's extremely fast.  No fiddling with holding your threads or straightening thread behind your presser foot.  I love it!


Bonnie has a couple of book out on leaders and enders.  She has lots of books on quilting with scraps. She also has a lot of free patterns.  Check her out: http://quiltville.com/

More: Leaders and Enders

My little experiment with leaders and enders had not ended, it is just beginning.  I can't wait to sit down to piece and slip a random charm under my presser foot.  Stay tuned...  It makes me feel like I have more time on my clock and have an extra hand.

It also reminds me of a Dr Seus book we had when we were kids called,  Dr. Seus' Sleep Book.


"A Mr. and Mrs. J. Carmichael Krox
Have just gone to bed near the town of Fort Knox.
And they, by the way, have the finest of clocks.
I’m not at all sure that I quite quite understand
Just how the thing works, with that one extra hand.
But I do know this clock does one very slick trick.
It doesn’t tick tock. How it goes, is tock tick.
So, with ticks in its tocker, and tocks in its ticker
It saves lots of time and the sleepers sleep quicker"


Friday, November 21, 2014

Forest Quilt

Ok, so I had to change the name of this quilt...from "Deer" to "Forest", now that it also has moose and bear.

Here are a few more details, on all the deer panels and blocks, I simply outlined the animals and some of the trees and rocks.
Freehand leaves....

I used Quilters Dream Puff batting so this is more like a comforter....and will be nice and warm.
This wetland meadow was quilted in a simple meander, following the water areas. 
The deer blocks were appliqued on the quilt leaving a raw edge.
After it was washed, they frayed nicely adding to the rustic 3D look. 

You can see the evolution of this quilt here.


Here it is after it was washed to fray the blocks.
This is a Christmas quilt for my 10 year old grandson who likes to hunt with his dad.
I think he will like it!

If you missed the blog post about piecing in the name, you can find it here.


Wednesday, November 19, 2014

Christmas Deer Quilt

I love pieced backings!
I love this book!  I've use it a lot over the past few years for pieced words and pieced a lot of backings with names. The alphabet pages are now taped to hold them in the book. 
Here's how I do it...it's really pretty easy.  I like to starch my fabric before I cut it for names.  You get less distortion with your 1.5 inch strips.  Best Press is my best friend.
I use it as I piece and press each letter.
When I get done It almost stands alone!
I always put the name about 15 inches down from the top sometimes in the center sometimes to the side.  Here I will fold the top of the quilt in 4th's and press it to make some creases.

Then I slice the backing 15 inches from the top.  The name block is 7.5 tall so I need to make another slice in the backing 7.5 inches further down.

The name block is 24.5 inches wide...
...so I will cut a 23.5 inch strip from the middle of the center 7.5 inch slice. Instead of cutting 23.5 inches from one end, I cut it from the middle so I can keep my pressing landmarks in the right place... 
Now, you can see the name block has been inserted in the middle of this strip.
And the pressing landmarks are going to line up perfectly to sew this back together.
It all lines back up and it's a breeze to put back together.
How fun is that?  It took me about 45 minutes.


Sunday, November 16, 2014

Christmas Quilt #2

This quilt is for my little 10 year old grandson--the little brother of future owner of the lime/blue/gray quilt I posted about earlier.  It's so totally different and just what he asked for.

This fabric was from a kit I bought, but didn't like the pattern, I just wanted the fabric because I knew someday it would be just right for someone.  Anyway, as you know, kits come with various sizes of yardage and pieces of this and that.

Here I took 2 of the larger pieces and made a background:


Then I cut apart a panel of deer and raw edged appliqued the blocks to this background.

I love the 3D effect of the raw edge applique. I used a smaller then normal stitch so the fabric threads should be secure and it will fray when it's washed for a more rustic look.

I had to piece and match the panoramic panel..can you tell?
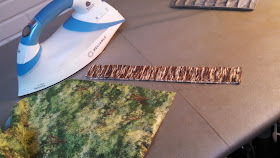
Here is the best method for me.  I find the repeating pattern, choose a spot and iron a fold.  Then I match this fold with the other piece and iron the whole thin together.  Ironing actually makes the fibers sort of stick together....if you are careful.

Then I take this to the sewing machine, gently open out the fold in the top fabric and carefully stitch along the fold line.


It's for a twin mattress and I made it long enough so the top panel will create a pillow tuck and the bottom panel will just hang over the bottom of the mattress.  Next up will be to piece the backing with his name and some leftover deer!


You Don't Always Have to Pin

I have been doing this for several years, but just thought to share it last night.

Sometimes you need a zillion pins: Once upon a time, I stitched 192 of these bias strips together.
Then I had to pin, starch, steam and block 32 of these diamonds. 
It took me 3 years to complete and looking back seems surreal!
Did I actually do that?

Just giving you a little background, so  you will believe me when I say: I know the importance of pinning for accurate sewing.

but there are times.....when you don't have to pin.

Yesterday, I stitched these 2 fabrics together.
Then, I positioned ( with rulers and measuring tape) these panel blocks on the background.

Then I got them exactly where I wanted them, I lifted up one half of the block and gave it a little puff of basting spray.  Use this very sparingly--you don't want it in other areas.  You can reposition the block (it's not permanent) and it will biodegrade in a few weeks, or it will launder out with first washing.  I rarely use it, this can has lasted me 6 years....but once in a while it's exactly what I need. 

I took the whole thing to the machine and stitched the blocks onto the background with raw edge applique.
See how lonely my little pin cushion is in the back?  Awwww.....

I don't pin borders. I use my iron.  I fold the quilt in 4th's and iron a crease in the edges.  I fold the border in fourths and iron
The results are evenly spaced creases.....  
Match them up as you sew and you will have perfect application every time.  No pinning.

I just start sewing, match up the first 2 creases, pinch that spot and hold it as I sew, repeat as you stitch down the seam.

I put this together yesterday without a single pin.


This sweet top for my granddaughter was sewn with no pins.

...except for the chiffon ruffle blocks--that  required major pinning.


Now that I have confessed, if you don't see me around for awhile, you can assume I am hiding from the quilt police. :)