Wednesday, March 30, 2011

Aspen Grove Wall Hanging

What a busy week making this wall hanging!
It took as long as a full sized quilt.  It added a hanging sleeve and it will hang nice and straight when it's used.  However, for this photo, I have it clipped to my beam with 3 gator clips . . . hence the saggy top border.

1.5 inch squares . . . no problem . . . just tedious.
756 of these little beauties!
It was the wonky trunks that really took me out of my comfort zone.  I really had a hard time cutting and sewing all the uneven strips.  I kept wanting to square things up!
It was fun to quilt though!  The trunks are all done with a dark gray.
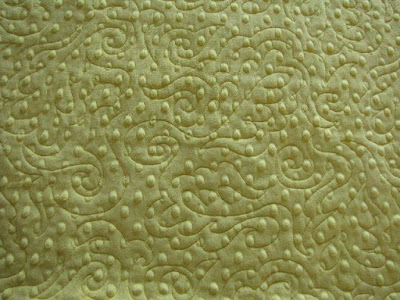
Gold thread gives the "leaves" a lot of texture.  
I have been sewing for over 30 years, but this was the first time I put a flange in a quilt.  I think I would rather insert a 1/4 inch border.  I know flanges are popular, but . . . 
This was designed by Theresa Eisinger, Graphic Designer of Quiltmaker Magazine.  There really was no pattern, just an example--so this was basically free-form sewing.

I knew I couldn't fold this up to mail it, so I went to the UPS Store and found out they have 4" x 4" boxes that are 48" long--perfect fit--as this wall hanging is 46" wide.  Yay!  Today, it is all rolled up, boxed and ready to ship.

Tuesday, March 29, 2011

Coping with Fuzzy Fallout.

As I mentioned in a previous post, most of  the baby quilts that I quilt for customers are backed with Minky.  Well, hey--I use it too--and I purchase it wholesale so I can keep several bolts on hand in a small variety of colors.

It was a constant fight with Minky-fuzz debris on the tables, on the floor, on me, and on anything else in the studio.  I no longer have this problem and thought I would share my solution.

I put up a hand held vacuum on the wall so it is always charged and ready to go.

I grab it before I ever start to make a cut in the Minky.

I use the back side of my cutting mat because minky fibers stick in the "self healing" cuts--preventing your mat from self healing.

After every cut, I run the vacuum up the quilt edge, gathering all the fibers from that side, then I swipe it across the mat cleaning up any loose fibers there in the cut, and lastly, I vacuum up the cut edge of the extra fabric trimmed from the quilt. It all takes a few seconds and then I move the quilt down for the next cut.


See, the cutting table looks just like it did before I started.

This extra minute or two while cutting, is much, much faster than having to clean up the whole area: floor, table, and everything else in the room!

Unless a customer does not want their quilt trimmed, I always trim for them.  It makes such a nice presentation when they receive their finished quilt.  Also quite a few quilts are mailed and it makes a considerably smaller package.

Saturday, March 19, 2011

Fleece Blankets

Finally all caught up with my customer's fleece blankets!

Thursday, March 17, 2011

Thimbleberries Lodge Sampler

Love these fall colors~!
I quilted this same sampler for another customer a year ago.  I did not look back at my previous photos to get ideas.  Now that was hard.  I often go back over my past photos to get ideas for current quilts I am working on.  
It's pretty hard to see the quilting on the front so I mixed it up with photos of the back.
Different leaf patterns in each border.
The green strip is pine needles?  I showed it to my husband and he didn't recognize it as such . . . said it looked more like tumble weeds.  Whatever!   
I reduced these gold setting triangles by quilting an inch wide frame around them.  I like the way it sets the leaf pattern away from the other fabrics.


Monday, March 14, 2011

Fun, Fun, Fun~

I have quilted this simple quilt pattern several times and I never get tired of the magical transformation the quilting performs.
So, which end is the top?  It looks great either way.
I love these appliqued flowers.
I quilted a couple more matching flowers in the body of the quilt.
Minky on the back.


Saturday, March 12, 2011

Black, White and Yellow!

This sophisticated baby is going to be stylin' with this modern theme.
Several customer baby quilts have come through my studio this past year with black/white and a splash of color: some with hot pink, some with lime green, some (like this one) with yellow, and one with red.
Minky back.
Minky is here to stay~!
Ninety-five percent of the baby quilts sent my way are backed with Minky.


Pink & Chocolate Baby Quilt

Minky, cotton, satin and chenille . . .

My customer requested a simple wavy stitch around each block.
 She was wise, because the chenille would not have gone under my hopping foot.
Some little girl is going to love the feel of this luscious pink minky.


Friday, March 11, 2011

"Bull!"

This fun quilt was made with "Bull" fabric by Maywood Studio.  This is the second quilt I have made from this fabric line.  Now I have enough left over to make a scrapy quilt!

I used an assortment of different fabrics from the collection.

I love stars!  So, I quilted randomly placed stars with streamers in each block.

The top panel was outlined only.

Most of the fabric has very tiny stars printed on the background.

Caramel colored Minky on the back.

Oh, yes, I went back and quilted the 2 sashings sections that I missed.  I actually didn't notice until I looked at this photo after it was bound.

LinkWithin

Related Posts Plugin for WordPress, Blogger...